With Docutain you have the possibility to create tags to organize your documents.
How these are created or changed is explained in this article:
1. Create a tag via main menu "Tags"
2. Create a tag via indexinformation of a document
1. Create a tag via main menu "Tags"
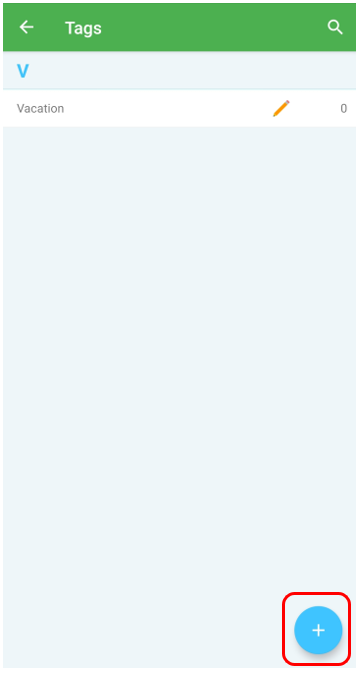
Go to main menu and tap on "Tags".
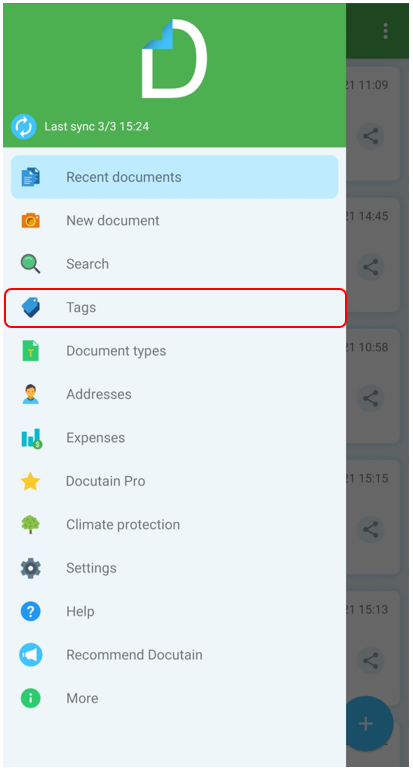
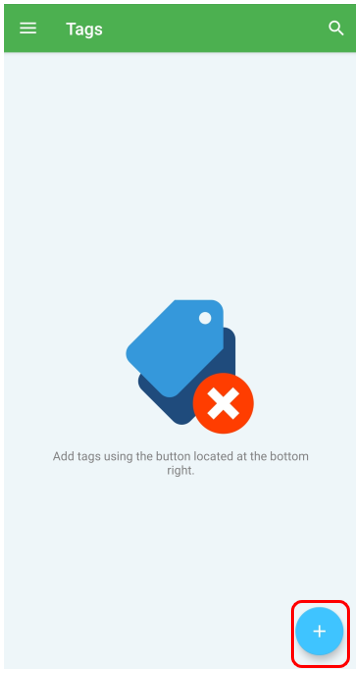
To create a new tag, click on the "plus" symbol in the lower right corner.
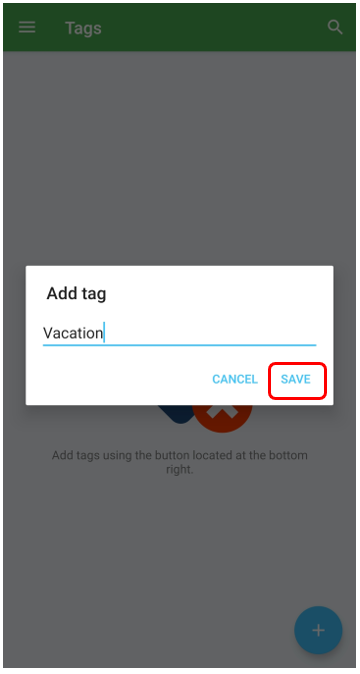
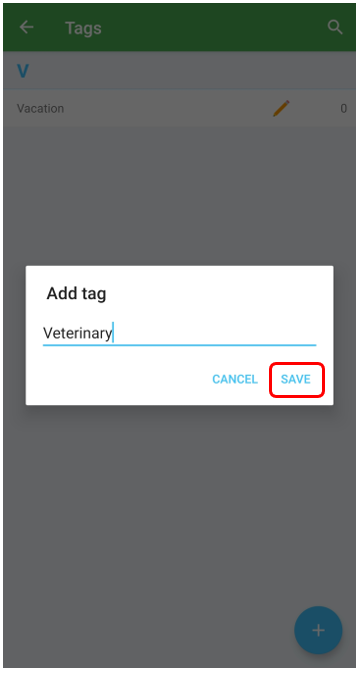
Enter your desired tag and confirm with "Save".
2. Create a tag via indexinformation of a document
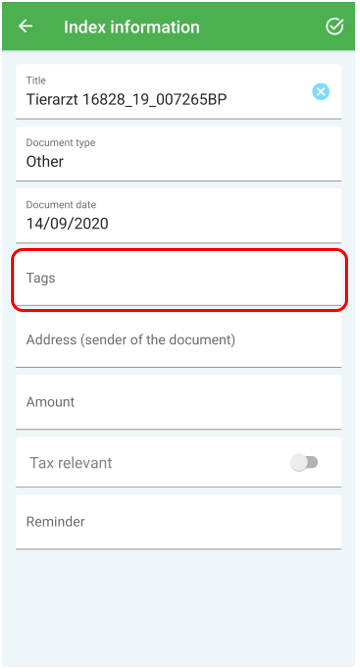
You also have the option of using the index information to create a new keyword from a document.
Go to the Index information of your document and tap on "Tags".
To create a new tag, click on the "plus" symbol in the lower right corner.
Enter your desired tag and confirm with "Save".
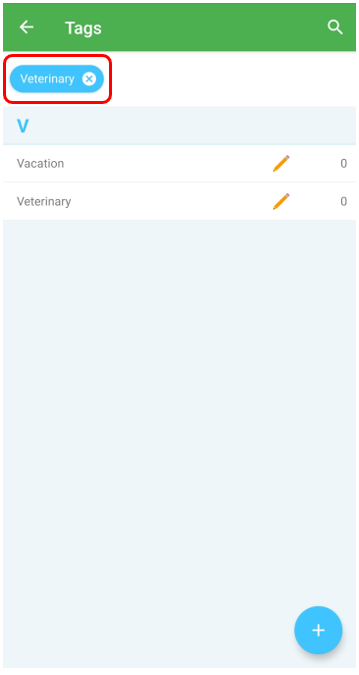
Your tag has been saved and is assigned directly to your document.
All tags assigned to your document are highlighted in blue in the top bar.
3. Change a tag
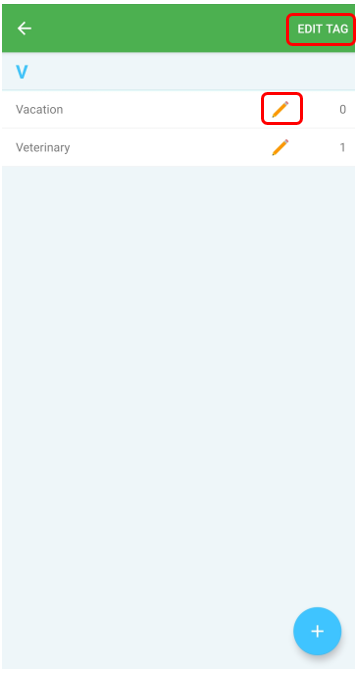
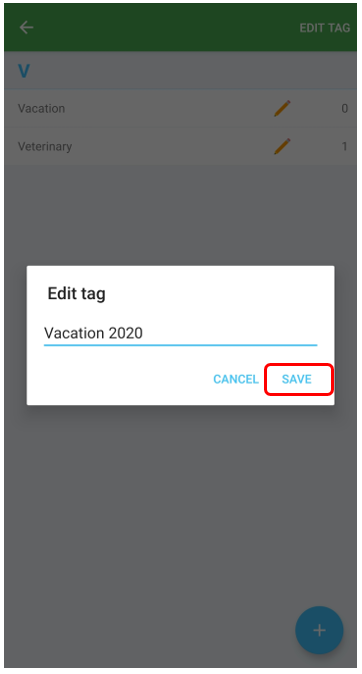
Open the Tags menu and tap the "pen" behind your tag or press longer on the tag and tap "Edit tag" to change it.
Confirm your changes with click on "Save".
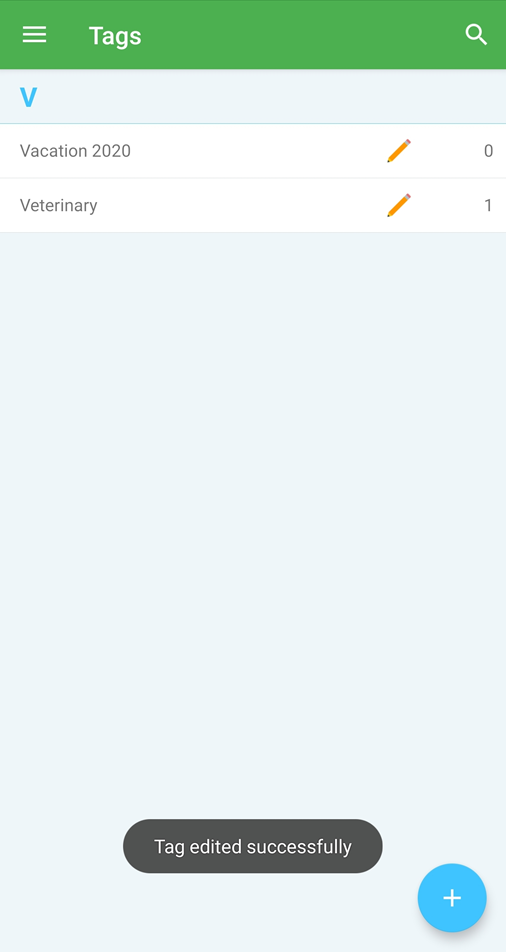
Your tag has been changed successfully.
4. Delete a tag
Open the tag menu and tap on the "bin" behind your tag to delete it.
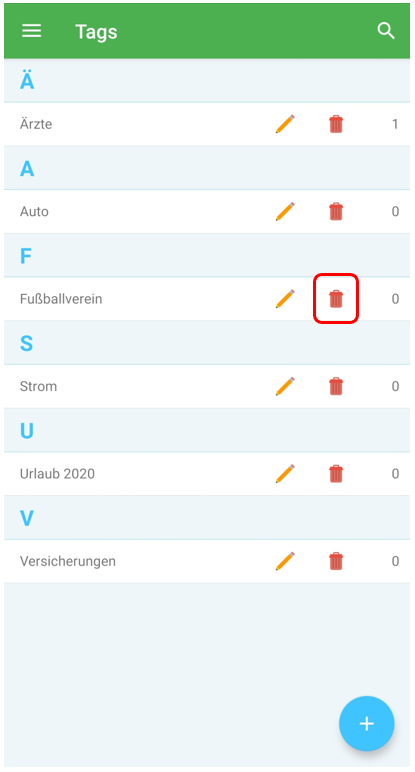
Note: A tag can only be deleted if there are no documents linked to it. Otherwise, you will receive an error message.

Comments
0 comments
Please sign in to leave a comment.